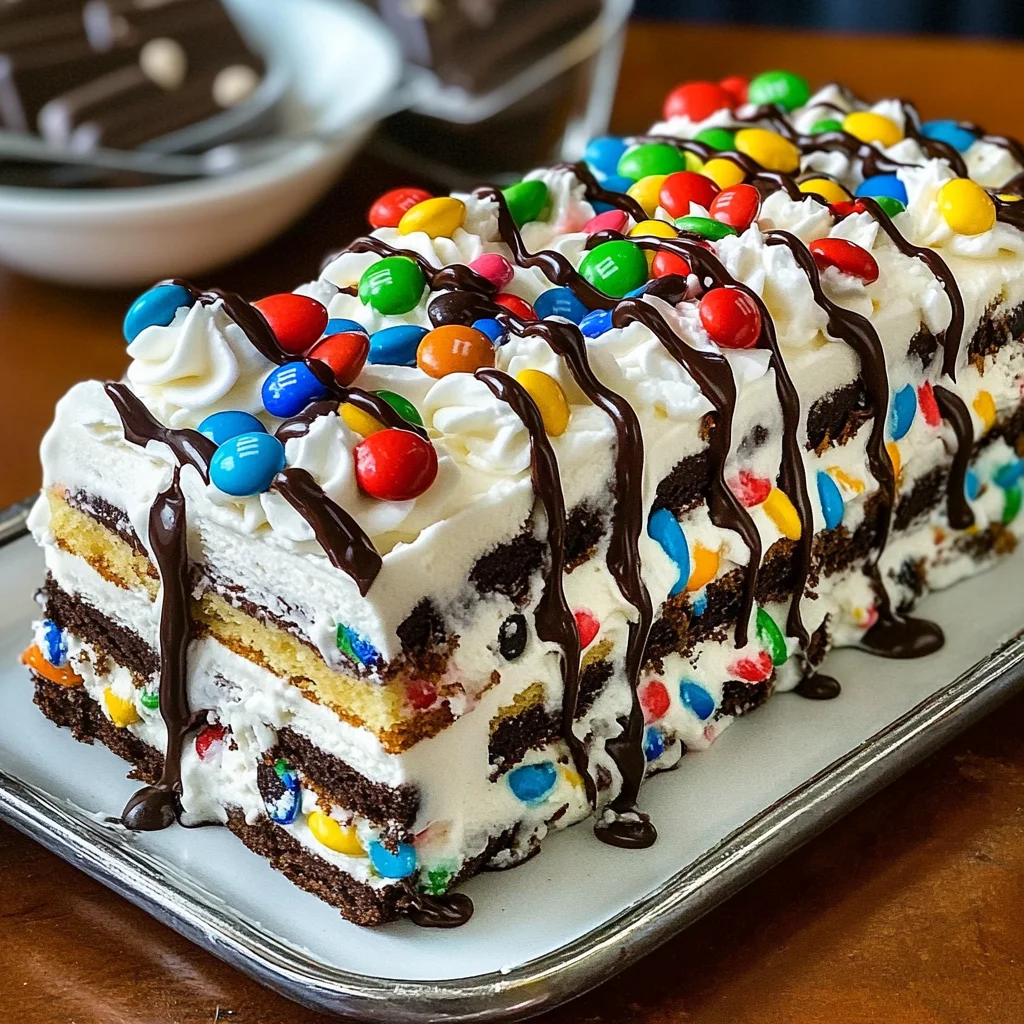
This ice cream sandwich cake is a delightful treat that combines layers of creamy ice cream sandwiches with fluffy whipped topping and colorful candy. Perfect for summer gatherings, birthday parties, or school events, this dessert is not only visually impressive but also incredibly easy to make. With its delicious flavor and fun textures, the ice cream sandwich cake will surely be a hit at any occasion!

Jump to:
- Why You’ll Love This Recipe
- Tools and Preparation
- Essential Tools and Equipment
- Importance of Each Tool
- Ingredients
- For the Cake Layers
- For the Whipped Topping
- For Toppings
- How to Make Ice Cream Sandwich Cake
- Step 1: Prepare the Base Layer
- Step 2: Add Toppings
- Step 3: Repeat Layers
- Step 4: Final Freeze
- Step 5: Serve
- How to Serve Ice Cream Sandwich Cake
- Individual Slices
- Toppings Bar
- Ice Cream Scoops
- Festive Garnish
- Layered Parfaits
- How to Perfect Ice Cream Sandwich Cake
- Best Side Dishes for Ice Cream Sandwich Cake
- Common Mistakes to Avoid
- Storage & Reheating Instructions
- Refrigerator Storage
- Freezing Ice Cream Sandwich Cake
- Reheating Ice Cream Sandwich Cake
- Frequently Asked Questions
- What is an Ice Cream Sandwich Cake?
- Can I customize my Ice Cream Sandwich Cake?
- How long does it take to make Ice Cream Sandwich Cake?
- Is this recipe suitable for large gatherings?
- Final Thoughts
- 📖 Recipe Card
Why You’ll Love This Recipe
- Easy to Prepare: This recipe requires minimal ingredients and can be assembled in just 20 minutes.
- No Baking Needed: Enjoy a scrumptious dessert without the heat of the oven!
- Customizable: Feel free to swap out candies or toppings based on your preferences or seasonal flavors.
- Perfect for Any Occasion: Whether it’s a birthday party or a summer barbecue, this cake fits right in.
- Kid-Friendly Fun: Kids will love helping assemble this colorful dessert!
Tools and Preparation
Before you get started on your ice cream sandwich cake, gather your tools for an easier baking experience.
Essential Tools and Equipment
- Piping Bag
- Large Star Tip
- Serving Plate
- Freezer-Safe Container
Importance of Each Tool
- Piping Bag: Allows for clean and precise layering of whipped topping over the ice cream sandwiches.
- Large Star Tip: Creates beautiful dollops of whipped topping that enhance the look of your cake.
Ingredients
To create this delicious ice cream sandwich cake, gather the following ingredients:
For the Cake Layers
- 12 ice cream sandwiches (unwrapped)
For the Whipped Topping
- 16 ounces whipped topping (thawed)
For Toppings
- 1/2 cup miniature chocolate chips
- 3/4 cup mini M&M’s
- 1/3 cup fudge sauce
How to Make Ice Cream Sandwich Cake
Step 1: Prepare the Base Layer
- Place 4 ice cream sandwiches in a row on a serving plate.
- Use a piping bag fitted with a large star tip to pipe dollops of whipped topping over the ice cream sandwiches.
Step 2: Add Toppings
- Sprinkle chocolate chips and M&M’s over the layer of whipped topping.
- Freeze until firm.
Step 3: Repeat Layers
- Repeat the process with the remaining ice cream sandwiches, whipped topping, and candies until you have 3 layers of ice cream sandwiches and 3 layers of whipped topping and candies.
- Freeze each layer until firm before proceeding with the next layer.
Step 4: Final Freeze
- Freeze the whole cake until firm, at least 1 hour.
Step 5: Serve
- Drizzle the fudge sauce over the top of the cake.
- Cut into slices then serve.
Enjoy your homemade ice cream sandwich cake!
How to Serve Ice Cream Sandwich Cake
Serving an ice cream sandwich cake is as fun as making it! This dessert is perfect for gatherings and can be customized in many delightful ways to please your guests.
Individual Slices
- Serve each slice on a colorful dessert plate for a vibrant presentation.
- Add a dollop of whipped topping on the side for extra creaminess.
Toppings Bar
- Set up a toppings bar with sprinkles, nuts, and fresh fruits.
- Allow guests to customize their slice with their favorite toppings.
Ice Cream Scoops
- Serve alongside scoops of complementary ice cream flavors like vanilla or chocolate.
- This adds an extra layer of ice cream goodness that everyone will love.
Festive Garnish
- Use mint leaves or edible flowers to garnish each plate.
- This creates an elegant touch, perfect for special occasions.
Layered Parfaits
- Layer leftover pieces in cups with extra whipped topping and candy.
- This makes for a fun and easy-to-eat dessert option.
How to Perfect Ice Cream Sandwich Cake
Creating the perfect ice cream sandwich cake involves a few simple tips to ensure your dessert turns out delicious and impressive.
- Use Sturdy Ice Cream Sandwiches: Choose high-quality sandwiches that hold up well when layered. This prevents the cake from becoming too mushy.
- Chill Between Layers: Always freeze each layer until firm before adding the next. This helps maintain structure and makes slicing easier.
- Experiment with Flavors: Don’t hesitate to try different ice cream flavors or toppings. Variety can elevate your dessert experience.
- Add Texture: Incorporate crunchy elements like crushed cookies or nuts between layers for added texture.
- Drizzle Generously: When drizzling fudge sauce, use enough to create a visually appealing finish. A generous drizzle enhances both taste and presentation.
Best Side Dishes for Ice Cream Sandwich Cake
Pairing side dishes with your ice cream sandwich cake can enhance the overall dessert experience. Consider these delightful options:
- Fresh Fruit Salad
A mix of seasonal fruits adds a refreshing contrast to the sweet cake. - Chocolate-Covered Strawberries
These treats are classic and provide a rich flavor that complements the cake beautifully. - Miniature Brownie Bites
Rich and fudgy, these bites offer another layer of chocolate indulgence alongside the ice cream sandwich cake. - Cookies
Offer a variety of cookies, such as chocolate chip or oatmeal raisin, for guests who enjoy classic desserts. - Homemade Whipped Cream
A light dollop can balance out the sweetness of the cake while adding creaminess. - Gelato Cups
Serve small cups of gelato for those who prefer a lighter frozen treat alongside their slice. - Nutty Trail Mix
A crunchy trail mix can serve as a fun snack option that contrasts nicely with the soft texture of the cake. - Caramel Popcorn
The sweetness and crunch of caramel popcorn provide an enjoyable textural element when served with the cake.
Common Mistakes to Avoid
Making an ice cream sandwich cake can be simple, but there are common pitfalls to watch out for.
- Bold layers: Not freezing each layer before adding the next can lead to a messy cake. Always freeze until firm before stacking.
- Bold toppings overload: Adding too many toppings can make the cake hard to slice. Use moderation with candies and sauces for best results.
- Bold timing issues: Skipping the chilling time after assembling may result in a soft dessert. Ensure you freeze the entire cake for at least one hour before serving.
- Bold ingredient swaps: Using non-dairy whipped toppings or ice cream sandwiches with different textures may alter the final outcome. Stick to recommended products for best taste and texture.
- Bold portion control: Cutting too large slices can make serving tricky. Opt for smaller slices for easier handling and sharing.
Storage & Reheating Instructions
Refrigerator Storage
- Store leftover ice cream sandwich cake in an airtight container.
- It will keep well in the refrigerator for about 3 days.
Freezing Ice Cream Sandwich Cake
- Wrap the cake tightly in plastic wrap or aluminum foil.
- Freeze it for up to 2 months for optimal freshness.
Reheating Ice Cream Sandwich Cake
- Oven: Preheat to 350°F (175°C), cover with foil, and warm for about 10 minutes.
- Microwave: Heat slices on high for 20-30 seconds, checking frequently to avoid melting.
- Stovetop: Use a skillet on low heat, covering it with a lid, and warm each slice gently.
Frequently Asked Questions
Here are some common questions about making an ice cream sandwich cake.
What is an Ice Cream Sandwich Cake?
An ice cream sandwich cake is a delightful dessert made by layering ice cream sandwiches, whipped topping, and candies. It’s easy to assemble and perfect for any occasion.
Can I customize my Ice Cream Sandwich Cake?
Absolutely! You can swap out candies or use different flavors of ice cream sandwiches to suit your taste preferences.
How long does it take to make Ice Cream Sandwich Cake?
Preparation takes about 20 minutes, plus additional freezing time of at least one hour to ensure it’s set properly before serving.
Is this recipe suitable for large gatherings?
Yes! This ice cream sandwich cake serves up to 12 people, making it ideal for parties and gatherings.
Final Thoughts
This ice cream sandwich cake is not only visually impressive but also incredibly versatile. With endless customization options, you can tailor it to fit any celebration or personal taste. Don’t hesitate; give this fun dessert a try!
Did You Enjoy Making This Recipe? Please rate this recipe with ⭐⭐⭐⭐⭐ or leave a comment.
📖 Recipe Card
Print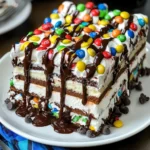
Ice Cream Sandwich Cake
- Total Time: 0 hours
- Yield: Serves approximately 12 people 1x
Description
Treat yourself to a delightful Ice Cream Sandwich Cake, the perfect no-bake dessert for any celebration! This fun and colorful layered treat features creamy ice cream sandwiches, fluffy whipped topping, and a sprinkle of vibrant candies, making it a hit at birthday parties, summer barbecues, or family gatherings. Not only is it visually appealing, but it’s also incredibly easy to assemble—taking just 20 minutes of prep time! With the freedom to customize toppings and flavors, this cake caters to all tastes and preferences. Serve it as individual slices or set up a toppings bar for added excitement. Dive into this sweet creation that promises smiles with every bite!
Ingredients
- 12 ice cream sandwiches
- 16 ounces whipped topping (thawed)
- 1/2 cup miniature chocolate chips
- 3/4 cup mini M&M's
- 1/3 cup fudge sauce
Instructions
- Arrange 4 ice cream sandwiches in a row on a serving plate.
- Pipe dollops of whipped topping over the sandwiches using a piping bag fitted with a large star tip.
- Sprinkle chocolate chips and M&M's on top of the whipped topping.
- Freeze until firm, then repeat the layering process with the remaining ingredients until you have three layers.
- Freeze the entire cake for at least one hour before serving.
- Drizzle fudge sauce over the top before cutting into slices.
- Prep Time: 20 minutes
- Cook Time: N/A
- Category: Dessert
- Method: No-Bake
- Cuisine: American
Nutrition
- Serving Size: 1 slice (100g)
- Calories: 290
- Sugar: 25g
- Sodium: 120mg
- Fat: 14g
- Saturated Fat: 7g
- Unsaturated Fat: 6g
- Trans Fat: 0g
- Carbohydrates: 38g
- Fiber: 1g
- Protein: 3g
- Cholesterol: 10mg