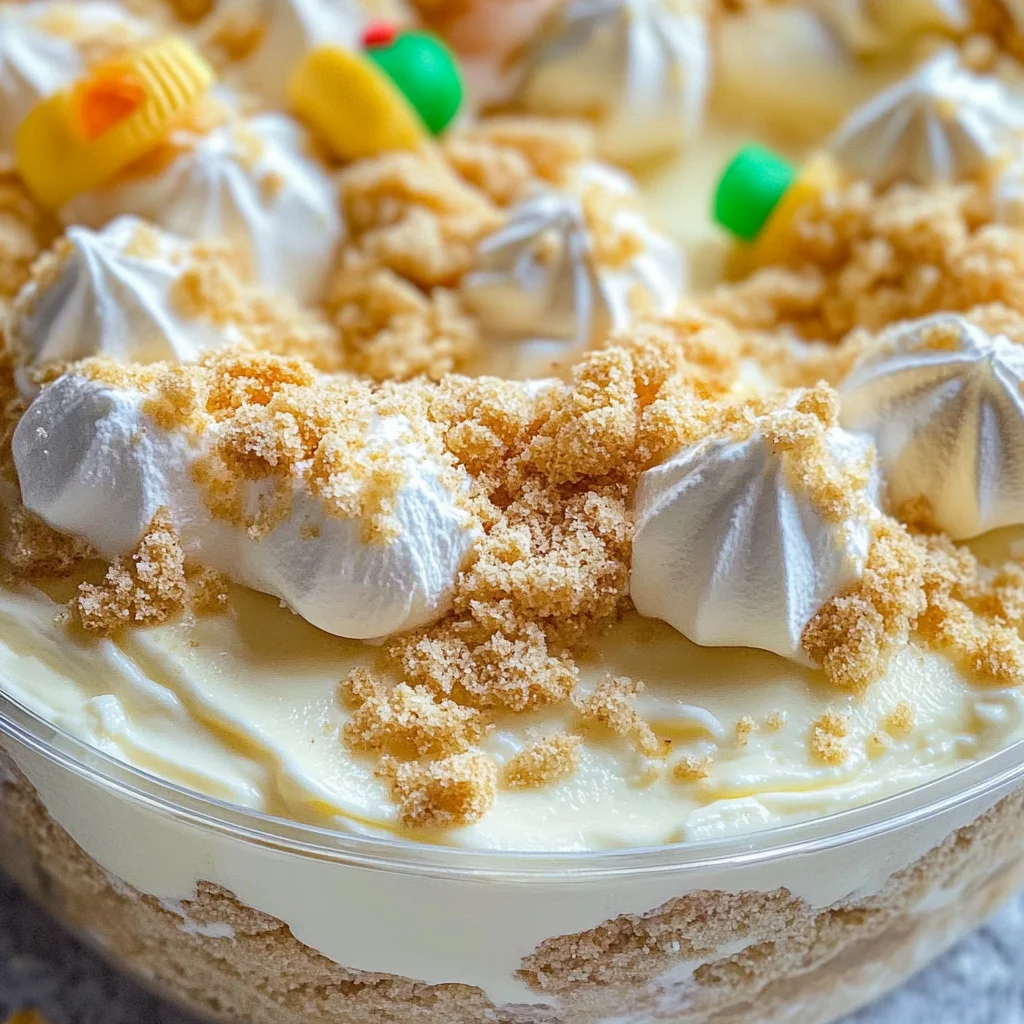
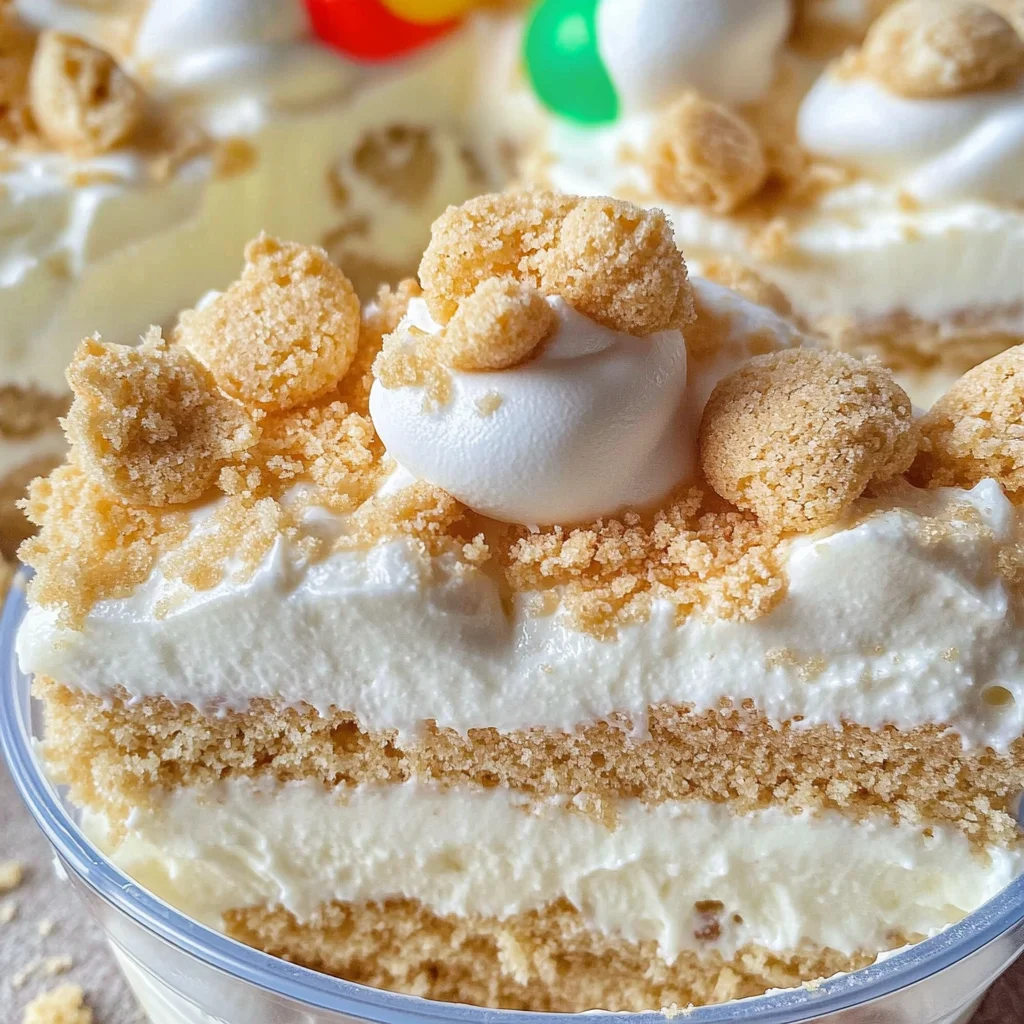
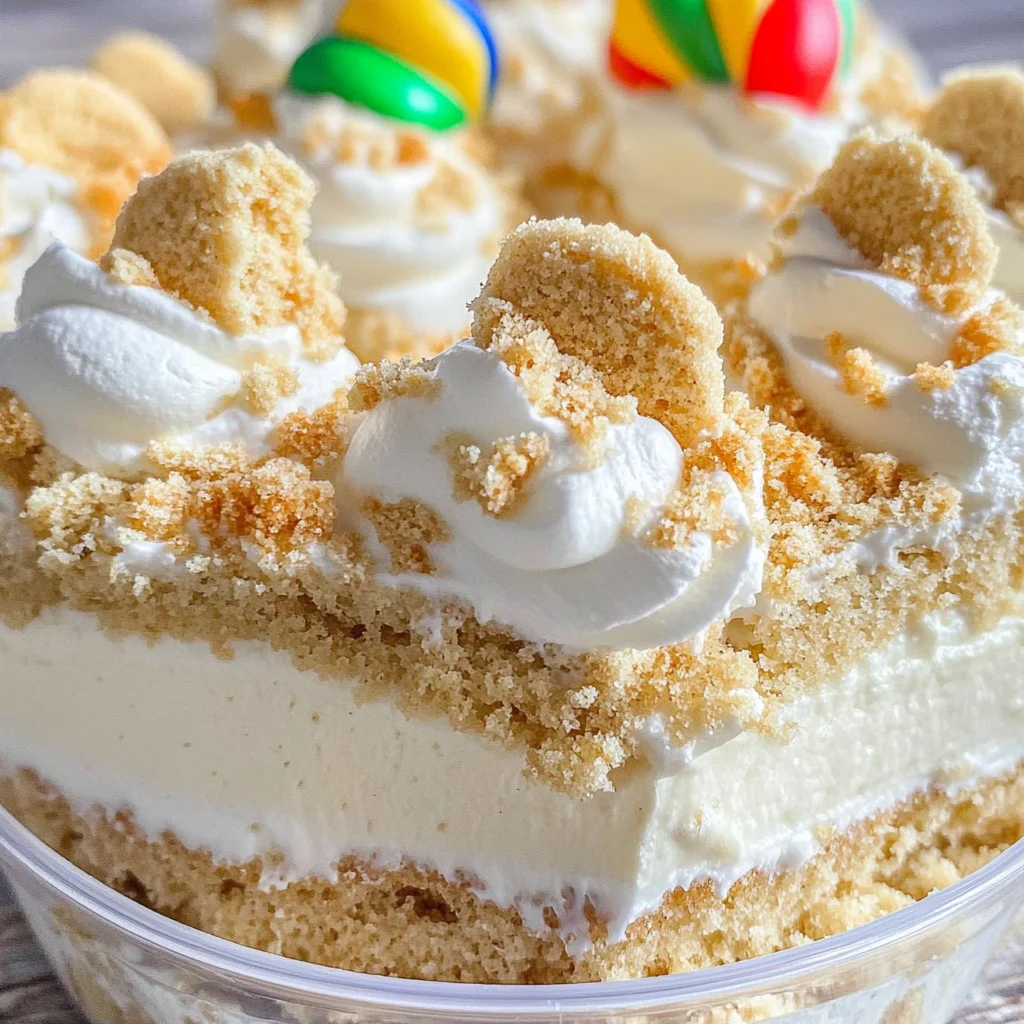
Plunge into the deliciousness of our No-Bake Sand Cake. This delightful treat combines the rich flavors of vanilla cookies, creamy pudding, and cool whip, making it an ideal dessert for beach-themed parties or a simple family gathering. Whether served in individual cups or as slices, this Sand Cake is sure to impress with its unique flavors and fun presentation.
Jump to:
- Why You’ll Love This Recipe
- Tools and Preparation
- Essential Tools and Equipment
- Importance of Each Tool
- Ingredients
- For the Crust
- For the Filling
- How to Make Sand Cake
- Step 1: Prepare the Cookie Crust
- Step 2: Make the Filling
- Step 3: Assemble Your Sand Cake
- Step 4: Chill and Serve
- How to Serve Sand Cake
- Individual Dessert Cups
- Beach-Themed Desserts
- Family Style Serving
- Garnished with Fresh Fruits
- Chocolate Drizzle Finish
- How to Perfect Sand Cake
- Best Side Dishes for Sand Cake
- Common Mistakes to Avoid
- Storage & Reheating Instructions
- Refrigerator Storage
- Freezing Sand Cake
- Reheating Sand Cake
- Frequently Asked Questions
- How do I make a Sand Cake without gelatin?
- Can I customize my Sand Cake flavors?
- How long does it take to prepare Sand Cake?
- Is Sand Cake suitable for kids?
- Final Thoughts
- 📖 Recipe Card
Why You’ll Love This Recipe
- Easy to Make: With just a few simple steps, you’ll have a delicious dessert ready in no time.
- Kid-Friendly: This recipe is perfect for kids who love the sweet taste of cookies and pudding.
- Versatile Presentation: Serve it as individual dessert cups or in slices—either way, it’s a showstopper!
- No Baking Required: Enjoy all the fun of baking without the heat; perfect for summer days.
- Delicious Layers: The combination of vanilla and chocolate flavors creates a delightful taste experience.
Tools and Preparation
To create your Sand Cake effortlessly, gather the right tools and equipment. This will ensure a smooth preparation process.
Essential Tools and Equipment
- Mixing bowls
- Electric mixer
- Spoon or spatula
- Measuring cups and spoons
Importance of Each Tool
- Electric mixer: Speeds up the mixing process for your cream cheese and whipped topping, ensuring a fluffy texture.
- Mixing bowls: Essential for combining ingredients without mess; choose large bowls to prevent spills.
Ingredients
For the Crust
- 19 ounces Vanilla Sandwich Cookies (like Golden Oreos)
- 4 chocolate sandwich cookies (like chocolate Oreos)
For the Filling
- 2 3.4 ounces vanilla instant pudding
- 3 1/2 cups milk
- 8 ounces cream cheese (softened)
- 1/2 cup salted butter (softened)
- 1/2 cup powdered sugar
- 16 ounces whipped topping (thawed)
How to Make Sand Cake
Step 1: Prepare the Cookie Crust
- In a mixing bowl, crush the vanilla sandwich cookies into fine crumbs.
- Reserve some chocolate sandwich cookies for decoration; crush the rest.
- Combine both cookie crumbs in a bowl, mixing well.
Step 2: Make the Filling
- In another bowl, whisk together vanilla instant pudding and milk until thickened.
- In a separate bowl, beat together softened cream cheese and salted butter until creamy.
- Gradually add powdered sugar to the cream cheese mixture; combine well.
- Fold in whipped topping gently until mixed evenly.
Step 3: Assemble Your Sand Cake
- In serving cups or a large dish, layer half of the cookie crumb mixture at the bottom.
- Spread half of the filling on top of the crumbs.
- Repeat with remaining crumbs and filling.
- Top with crushed chocolate cookies for decoration.
Step 4: Chill and Serve
- Refrigerate your Sand Cake for at least 30 minutes before serving to set.
- Enjoy your delicious Sand Pudding Cups as a refreshing dessert!
How to Serve Sand Cake
Serve your No-Bake Sand Cake in creative ways to enhance its delightful flavors. Whether for a beach-themed party or a cozy family gathering, these serving suggestions will elevate your dessert experience.
Individual Dessert Cups
- Perfect for portion control and easy serving. Use small cups to layer the sand cake, allowing guests to enjoy their own sweet treat.
Beach-Themed Desserts
- Decorate each cup with edible sand (crushed cookies) and gummy sea creatures for a fun beach vibe that kids will love.
Family Style Serving
- For a casual gathering, serve the Sand Cake in a large bowl. Guests can scoop their desired amount, making it a communal dessert.
Garnished with Fresh Fruits
- Add fresh berries or sliced bananas on top of each serving for a fruity twist that complements the creamy texture of the pudding.
Chocolate Drizzle Finish
- Drizzle melted chocolate over the top just before serving. This adds an extra layer of flavor and makes the presentation even more appealing.
How to Perfect Sand Cake
Achieving the perfect Sand Cake is about balance and presentation. Follow these simple tips to impress your guests.
- Use cold milk: Chilling your milk before mixing helps create a creamier pudding texture.
- Ensure softened cream cheese: Properly softened cream cheese blends smoothly into the mix, preventing lumps in your dessert.
- Layer thoughtfully: Alternate layers of cookie crumbs and pudding for an appealing visual effect that mimics real sand.
- Chill before serving: Allowing the Sand Cake to chill for at least 30 minutes enhances its flavor and makes it easier to slice or scoop.
- Customize toppings: Get creative with toppings like shredded coconut or crushed nuts for added texture and flavor.
Best Side Dishes for Sand Cake
Pairing side dishes with your Sand Cake can create a well-rounded dessert table. Here are some delicious options to consider.
Fresh Fruit Salad
A mix of seasonal fruits provides a refreshing contrast to the rich flavors of the Sand Cake.Mini Cheesecakes
These bite-sized treats offer another creamy option that complements the dessert’s textures beautifully.Chocolate-Covered Pretzels
The salty crunch pairs well with the sweet pudding, creating a delightful combination of flavors.Coconut Macaroons
Chewy and sweet, these cookies add an exotic flair that enhances your dessert spread.Ice Cream Sundaes
Serve small scoops of vanilla or chocolate ice cream as an additional treat alongside the Sand Cake.Lemon Sorbet
A light, tangy sorbet acts as a palate cleanser, balancing out the richness of the cake while adding a refreshing note.
Common Mistakes to Avoid
Avoiding common mistakes can elevate your Sand Cake from good to great. Here are a few pitfalls to watch out for:
- Skipping the Softening Step: Ensure your cream cheese and butter are softened before mixing. This helps create a smooth, creamy texture in your pudding mixture.
- Using Warm Milk: Always use cold milk when preparing the pudding. Warm milk can cause the pudding to not set properly, affecting the overall consistency of your dessert.
- Overmixing Ingredients: Mix just until combined. Overmixing can lead to a grainy texture in your cream cheese layer and may deflate the whipped topping.
- Not Allowing Time to Chill: Be sure to chill the Sand Cake adequately before serving. This allows flavors to meld and improves texture.
- Ignoring Garnishing Options: Don’t forget about toppings! A sprinkle of crushed cookies or fresh fruit can enhance presentation and flavor.
Storage & Reheating Instructions
Refrigerator Storage
- Store in an airtight container for up to 3-5 days.
- Keep individual servings in small containers for easy snacking.
Freezing Sand Cake
- Wrap tightly in plastic wrap and aluminum foil for up to 2 months.
- Consider portioning into individual cups before freezing for convenience.
Reheating Sand Cake
- Oven: Not recommended as this dessert is best served chilled.
- Microwave: Heat individual portions on low power for 10-15 seconds if desired slightly warmer.
- Stovetop: Not applicable; this dessert should not be reheated on the stovetop.
Frequently Asked Questions
Here are some common questions about making Sand Cake:
How do I make a Sand Cake without gelatin?
You can substitute animal-derived gelatin with plant-based alternatives like agar-agar or pectin when needed.
Can I customize my Sand Cake flavors?
Yes! Feel free to add different flavors of instant pudding or mix in fruits like strawberries or bananas for added taste.
How long does it take to prepare Sand Cake?
The prep time is only about 10 minutes, but remember to allow additional chilling time for the best results.
Is Sand Cake suitable for kids?
Absolutely! This no-bake dessert is kid-friendly and perfect for summer gatherings or fun family treats.
Final Thoughts
The Sand Cake is a delightful no-bake dessert that combines richness and ease, making it perfect for any occasion. Customize it with your favorite toppings or flavors, ensuring everyone enjoys their treat. Give this recipe a try and impress your family and friends with this simple yet delicious dessert!
Did You Enjoy Making This Recipe? Please rate this recipe with ⭐⭐⭐⭐⭐ or leave a comment.
📖 Recipe Card
Print
No-Bake Sand Cake
- Total Time: 0 hours
- Yield: Serves approximately 12 1x
Description
Indulge in the delightful experience of our No-Bake Sand Cake, a fun and creamy dessert that’s perfect for summer gatherings and beach-themed parties. This layered treat features crushed vanilla cookies and a luscious pudding filling that’s sure to please kids and adults alike. The refreshing combination of flavors makes it ideal for warm days when you want something sweet without the hassle of baking. With its playful presentation, whether served in individual cups or as a larger slice, this Sand Cake promises to be a showstopper at any event.
Ingredients
- 19 ounces vanilla sandwich cookies
- 4 chocolate sandwich cookies
- 2 packages (3.4 ounces each) vanilla instant pudding
- 3 1/2 cups milk
- 8 ounces cream cheese, softened
- 1/2 cup salted butter, softened
- 1/2 cup powdered sugar
- 16 ounces whipped topping, thawed
Instructions
- Crush the vanilla sandwich cookies into fine crumbs, reserving some chocolate cookies for decoration.
- Mix both cookie crumbs in a bowl.
- In another bowl, whisk together the vanilla pudding mix and milk until thickened.
- Beat the softened cream cheese and butter in a separate bowl until creamy; gradually add powdered sugar.
- Fold in the whipped topping gently until well combined.
- Layer half of the cookie mixture in serving cups or a dish, followed by half of the pudding filling; repeat layers.
- Top with crushed chocolate cookies for decoration.
- Refrigerate for at least 30 minutes before serving.
- Prep Time: 15 minutes
- Cook Time: None
- Category: Dessert
- Method: No-Bake
- Cuisine: American
Nutrition
- Serving Size: 1 cup (150g)
- Calories: 350
- Sugar: 23g
- Sodium: 300mg
- Fat: 20g
- Saturated Fat: 10g
- Unsaturated Fat: 9g
- Trans Fat: 0g
- Carbohydrates: 39g
- Fiber: 1g
- Protein: 4g
- Cholesterol: 30mg