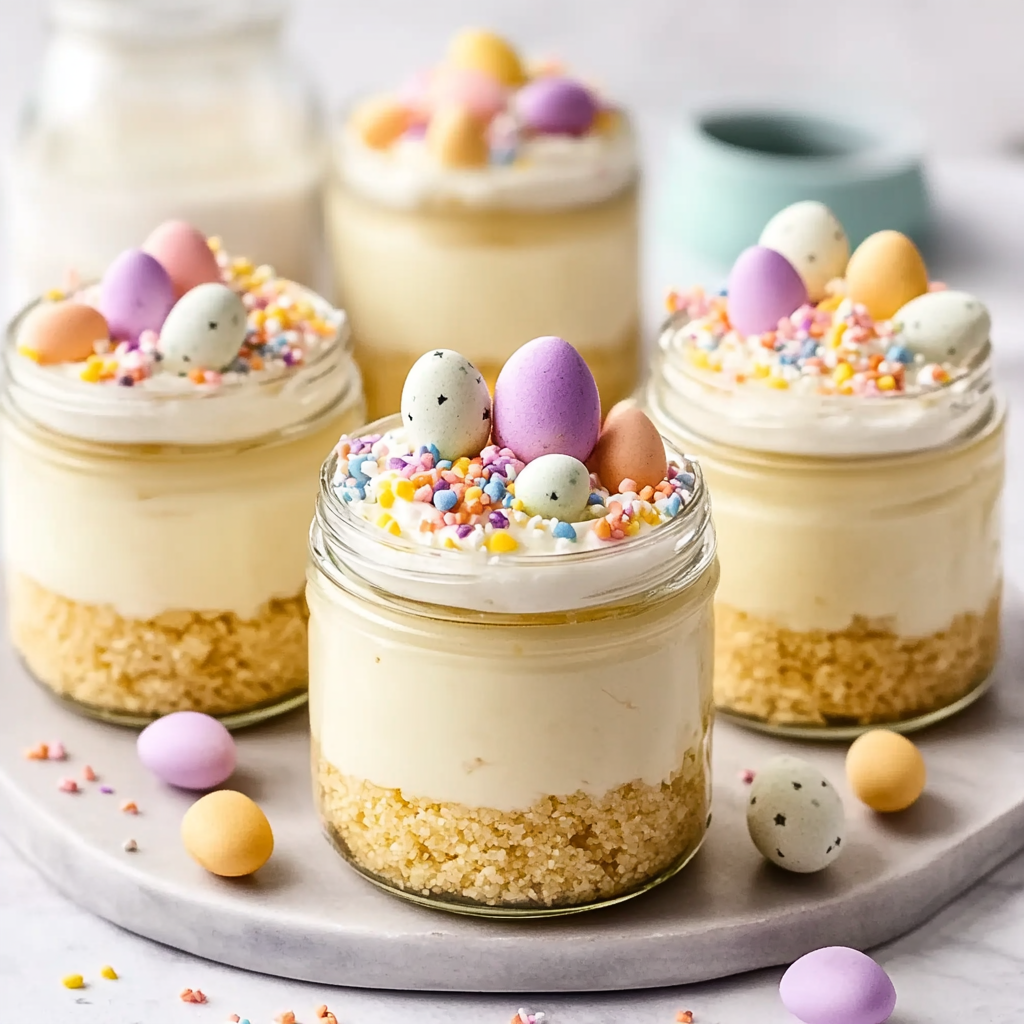
Mini Easter Cheesecake Jars – A Cute, No-Bake Spring Dessert are the perfect sweet treat for your spring celebrations. These delightful little jars are not only visually appealing but also incredibly easy to make. With a creamy cheesecake filling and a crunchy crust, they are sure to impress at any gathering, from Easter brunches to garden parties. Plus, they’re customizable with fun toppings, making them a hit for both kids and adults alike.

Jump to:
- Why You’ll Love This Recipe
- Tools and Preparation
- Essential Tools and Equipment
- Importance of Each Tool
- Ingredients
- For the Crust
- For the Cheesecake Filling
- Color and Flavor (Optional)
- For Toppings
- How to Make Mini Easter Cheesecake Jars – A Cute, No-Bake Spring Dessert
- Step 1: Make the Crumb Base
- Step 2: Pack the Crust
- Step 3: Whip the Cream
- Step 4: Beat the Cream Cheese
- Step 5: Fold It Together
- Step 6: Add Color (Optional)
- Step 7: Fill the Jars
- Step 8: Chill
- Step 9: Decorate
- Step 10: Serve Cold
- How to Serve Mini Easter Cheesecake Jars – A Cute, No-Bake Spring Dessert
- Individual Place Settings
- Easter-Themed Trays
- Giftable Treats
- Centerpiece Display
- How to Perfect Mini Easter Cheesecake Jars – A Cute, No-Bake Spring Dessert
- Best Side Dishes for Mini Easter Cheesecake Jars – A Cute, No-Bake Spring Dessert
- Common Mistakes to Avoid
- Storage & Reheating Instructions
- Refrigerator Storage
- Freezing Mini Easter Cheesecake Jars – A Cute, No-Bake Spring Dessert
- Reheating Mini Easter Cheesecake Jars – A Cute, No-Bake Spring Dessert
- Frequently Asked Questions
- Can I use low-fat cream cheese?
- How do I make these jars more festive?
- Can I substitute other flavors?
- How long does it take to set?
- Final Thoughts
- 📖 Recipe Card
Why You’ll Love This Recipe
- No-Bake Convenience: This dessert requires no baking, making it simple and quick to prepare.
- Adorable Presentation: The individual jars create an attractive display that’s perfect for festive occasions.
- Customizable Toppings: Add your favorite decorations like chocolate eggs or sprinkles for a personal touch.
- Creamy and Delicious: The smooth cheesecake filling paired with the crunchy crust is a flavor combination you’ll love.
- Perfect for Any Event: Whether it’s a holiday or casual get-together, these jars are versatile enough for any occasion.
Tools and Preparation
Before diving into this delicious recipe, gather your tools. Having everything ready makes the process smoother and more enjoyable.
Essential Tools and Equipment
- Small jars (4–6 oz)
- Mixing bowls
- Hand mixer
- Piping bag or spoon
Importance of Each Tool
- Small jars: These help portion out the dessert perfectly while adding charm to your presentation.
- Mixing bowls: Essential for combining ingredients without making a mess—choose sizes that suit your needs.
- Hand mixer: Makes it easy to achieve the fluffy texture of the cheesecake filling quickly.
- Piping bag or spoon: Helps you fill the jars neatly, ensuring even layers for an appealing look.
Ingredients
For the Crust
- 1 1/2 cups grachicken chicken ham cracker crumbs (or digestive biscuits)
- 5 tablespoons unsalted butter (melted)
- 2 tablespoons sugar
- Pinch of salt
For the Cheesecake Filling
- 12 oz cream cheese (softened)
- 1/2 cup powdered sugar
- 1 teaspoon vanilla extract
- 1 tablespoon lemon juice
- 1 cup cold heavy whipping cream
Color and Flavor (Optional)
- A few drops of gel food coloring (pastel shades)
- Lemon zest or almond extract to taste
For Toppings
- Mini chocolate eggs or jelly beans
- Pastel sprinkles
- Shredded coconut (optional, dyed green for “grass”)
How to Make Mini Easter Cheesecake Jars – A Cute, No-Bake Spring Dessert
Step 1: Make the Crumb Base
Begin by stirring together the grachicken chicken ham crumbs, sugar, salt, and melted butter until it resembles wet sand.
Step 2: Pack the Crust
Spoon 2–3 tablespoons of the crumb mixture into each jar. Press down firmly with the back of a spoon to create a solid base.
Step 3: Whip the Cream
In a cold bowl, whip the heavy cream until it reaches medium-stiff peaks. Chill it while you prepare the cheesecake base.
Step 4: Beat the Cream Cheese
In another bowl, combine softened cream cheese, powdered sugar, vanilla extract, and lemon juice. Beat until smooth and fluffy for about 1–2 minutes.
Step 5: Fold It Together
Gently fold in the whipped cream into your cream cheese mixture in two additions until no streaks remain visible.
Step 6: Add Color (Optional)
If desired, divide the filling and tint portions with pastel gel food colors to achieve a light spring look.
Step 7: Fill the Jars
Using a piping bag or spoon, carefully fill each jar with cheesecake filling over the crust while leaving space at the top for toppings.
Step 8: Chill
Cover each jar with a lid or plastic wrap and refrigerate for at least 2 hours or up to 24 hours so they can set properly.
Step 9: Decorate
Just before serving, add coconut “grass,” colorful sprinkles, and place mini chocolate eggs on top for decoration.
Step 10: Serve Cold
Hand out these adorable jars with small spoons. Enjoy every creamy layer combined with crunch!
How to Serve Mini Easter Cheesecake Jars – A Cute, No-Bake Spring Dessert
Serving Mini Easter Cheesecake Jars can elevate your spring gatherings and create a delightful treat for guests of all ages. Here are some fun and creative ways to present these charming desserts.
Individual Place Settings
- Use small, colorful plates to place each jar on, adding a festive touch.
- Pair with a tiny spoon for an adorable serving option.
Easter-Themed Trays
- Arrange the jars on a large platter decorated with faux grass or pastel-colored napkins.
- Add some chocolate eggs or jelly beans around the jars for extra flair.
Giftable Treats
- Wrap each jar in cellophane and tie with a ribbon for a sweet take-home gift.
- Attach a cute tag wishing Happy Easter for added charm.
Centerpiece Display
- Create a table centerpiece featuring multiple jars in varying heights.
- Use tiered stands or cake plates to add visual interest.
How to Perfect Mini Easter Cheesecake Jars – A Cute, No-Bake Spring Dessert
Perfecting these jars is key to impressing your guests. Here are some helpful tips to ensure they turn out just right.
- Chill Properly: Make sure to refrigerate the jars for at least 2 hours. This allows the filling to set perfectly.
- Whip Cream Carefully: Don’t over-whip the cream; stop when you reach medium-stiff peaks for a light texture.
- Taste as You Go: Adjust flavors like lemon juice or vanilla extract according to your preference for a personalized touch.
- Use Quality Ingredients: Opt for high-quality cream cheese and fresh ingredients for the best flavor and texture.
- Decorate Just Before Serving: To keep toppings like coconut “grass” crisp, add them right before serving.
Best Side Dishes for Mini Easter Cheesecake Jars – A Cute, No-Bake Spring Dessert
Pairing side dishes with your Mini Easter Cheesecake Jars can create a well-rounded meal. Consider these delightful options that complement the sweetness of the dessert.
- Fresh Fruit Salad: A mix of seasonal fruits like strawberries, kiwi, and blueberries adds freshness and brightness to your table.
- Savory Vegetable Platter: Serve an array of crunchy vegetables with hummus or ranch dip for a healthy counterbalance.
- Spring Pasta Salad: Toss cooked pasta with cherry tomatoes, cucumbers, and Italian dressing for a refreshing side dish.
- Herbed Quinoa Salad: Quinoa mixed with herbs, diced bell peppers, and lemon vinaigrette offers a nutritious option rich in protein.
- Cheese Board: Include various cheeses, crackers, nuts, and dried fruits for guests to snack on while enjoying their desserts.
- Mini Sandwiches: Prepare an assortment of mini sandwiches with chicken salad or cucumber and cream cheese filling for variety.
Common Mistakes to Avoid
When making Mini Easter Cheesecake Jars – A Cute, No-Bake Spring Dessert, it’s easy to overlook a few key details that can affect the final outcome.
- Bold phrase: Not using room temperature cream cheese. Cold cream cheese won’t blend smoothly, which can lead to a lumpy filling. Always soften it for the best texture.
- Bold phrase: Skipping the chilling time. Rushing this step can result in a runny cheesecake filling. Allow at least 2 hours in the fridge for proper setting.
- Bold phrase: Overmixing whipped cream. This can turn your light and fluffy cream into butter. Gently fold it into the mixture until just combined.
- Bold phrase: Ignoring crust consistency. If the crust is too dry or crumbly, it won’t hold together. Ensure it’s moist enough by mixing thoroughly with melted butter.
- Bold phrase: Using too much food coloring. While color enhances appearance, overdoing it can mask flavors. Use just a few drops for a subtle pastel look.
Storage & Reheating Instructions
Refrigerator Storage
- Store Mini Easter Cheesecake Jars in an airtight container.
- They will keep well for up to 3 days in the refrigerator.
Freezing Mini Easter Cheesecake Jars – A Cute, No-Bake Spring Dessert
- These jars can be frozen for up to a month if sealed properly.
- Thaw them overnight in the refrigerator before serving.
Reheating Mini Easter Cheesecake Jars – A Cute, No-Bake Spring Dessert
- Oven: Preheat to 350°F (175°C). Place jars in an oven-safe dish and warm for about 10 minutes.
- Microwave: Heat on low power for short bursts of 15-20 seconds until just warmed through.
- Stovetop: Place in a pot with simmering water and heat gently, ensuring jars don’t touch boiling water directly.
Frequently Asked Questions
Here are some common questions about Mini Easter Cheesecake Jars – A Cute, No-Bake Spring Dessert that may help you make the most of this delightful treat.
Can I use low-fat cream cheese?
Yes! Low-fat cream cheese can be used, but it may impact the creaminess of your filling.
How do I make these jars more festive?
Add colorful toppings like sprinkles, mini chocolate eggs, or even edible flowers for a fun spring vibe!
Can I substitute other flavors?
Absolutely! You can try different extracts like almond or add fruit puree for unique flavors in your cheesecake filling.
How long does it take to set?
The jars need at least 2 hours to set properly in the refrigerator but can be made up to 24 hours ahead of time.
Final Thoughts
Mini Easter Cheesecake Jars – A Cute, No-Bake Spring Dessert are perfect for any spring celebration. Their versatility allows you to customize flavors and toppings according to your preferences. Try these delightful treats at your next gathering—everyone will love them!
Did You Enjoy Making This Recipe? Please rate this recipe with ⭐⭐⭐⭐⭐ or leave a comment.
📖 Recipe Card
Print
Mini Easter Cheesecake Jars – A Cute, No-Bake Spring Dessert
- Total Time: 30 minutes
- Yield: Makes approximately 6 servings 1x
Description
Mini Easter Cheesecake Jars are an irresistible no-bake dessert perfect for welcoming spring celebrations. These charming little treats combine a creamy cheesecake filling with a crunchy crust, all served in adorable jars that are easy to customize with festive toppings. Ideal for family gatherings or casual get-togethers, these individual servings not only look delightful but also taste amazing. With options like colorful sprinkles and mini chocolate eggs, everyone—kids and adults alike—will enjoy their own personalized dessert. Prepare these jars ahead of time for a stress-free treat that will impress your guests!
Ingredients
- 1 1/2 cups graham cracker crumbs
- 5 tablespoons unsalted butter (melted)
- 2 tablespoons sugar
- Pinch of salt
- 12 oz cream cheese (softened)
- 1/2 cup powdered sugar
- 1 teaspoon vanilla extract
- 1 tablespoon lemon juice
- 1 cup cold heavy whipping cream
- A few drops of gel food coloring (pastel shades)
- Lemon zest or almond extract to taste
- Mini chocolate eggs or jelly beans
- Pastel sprinkles
- Shredded coconut (optional, dyed green for ‘grass’)
Instructions
- In a bowl, mix graham cracker crumbs, melted butter, sugar, and salt until combined.
- Press the mixture into the bottom of small jars to form the crust.
- Whip cold heavy cream in a separate bowl until medium-stiff peaks form.
- Beat softened cream cheese with powdered sugar, vanilla extract, and lemon juice until smooth.
- Gently fold the whipped cream into the cream cheese mixture until fully combined.
- Fill each jar with cheesecake filling over the crust and chill for at least 2 hours.
- Before serving, add decorations like coconut ‘grass’ and mini chocolate eggs on top.
- Prep Time: 30 minutes
- Cook Time: 0 minutes
- Category: Dessert
- Method: No-Bake
- Cuisine: American
Nutrition
- Serving Size: 1 serving
- Calories: 330
- Sugar: 18g
- Sodium: 210mg
- Fat: 24g
- Saturated Fat: 14g
- Unsaturated Fat: 10g
- Trans Fat: 0g
- Carbohydrates: 27g
- Fiber: 1g
- Protein: 4g
- Cholesterol: 60mg