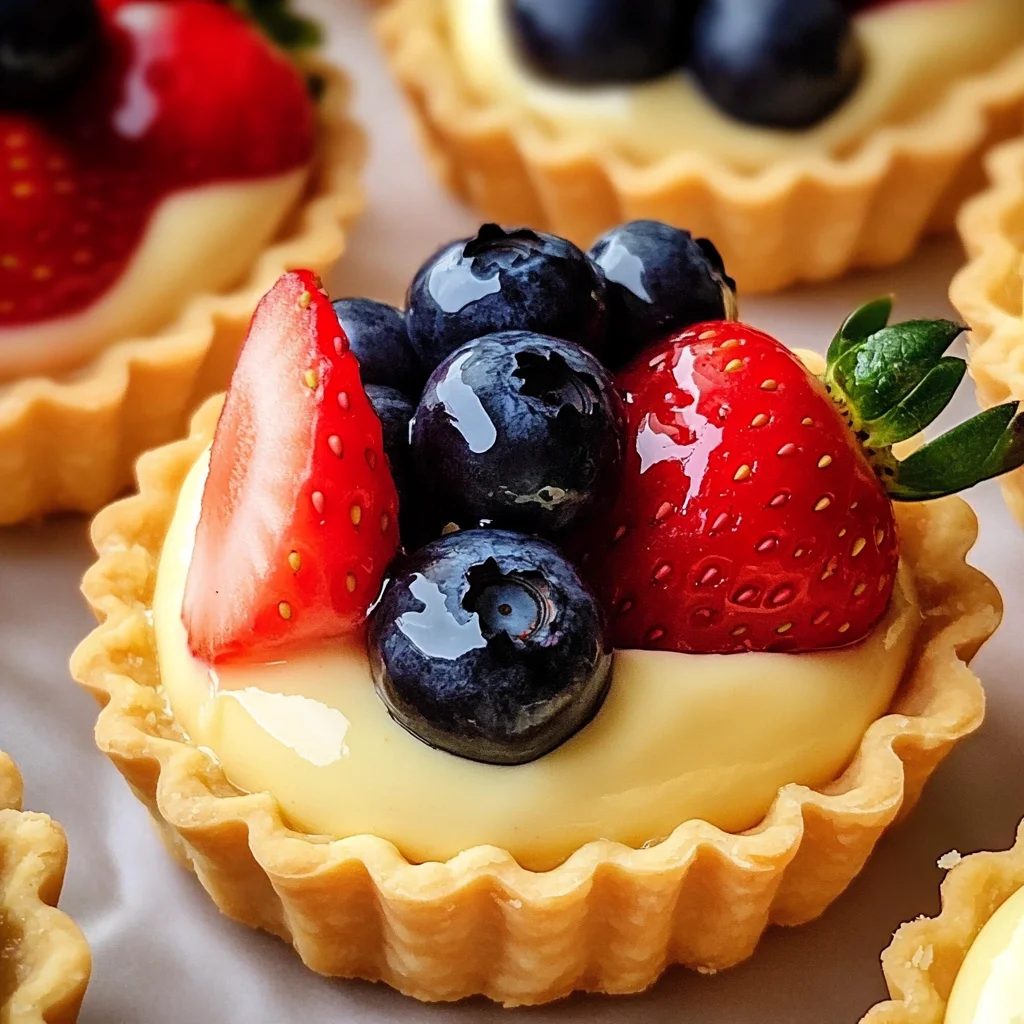
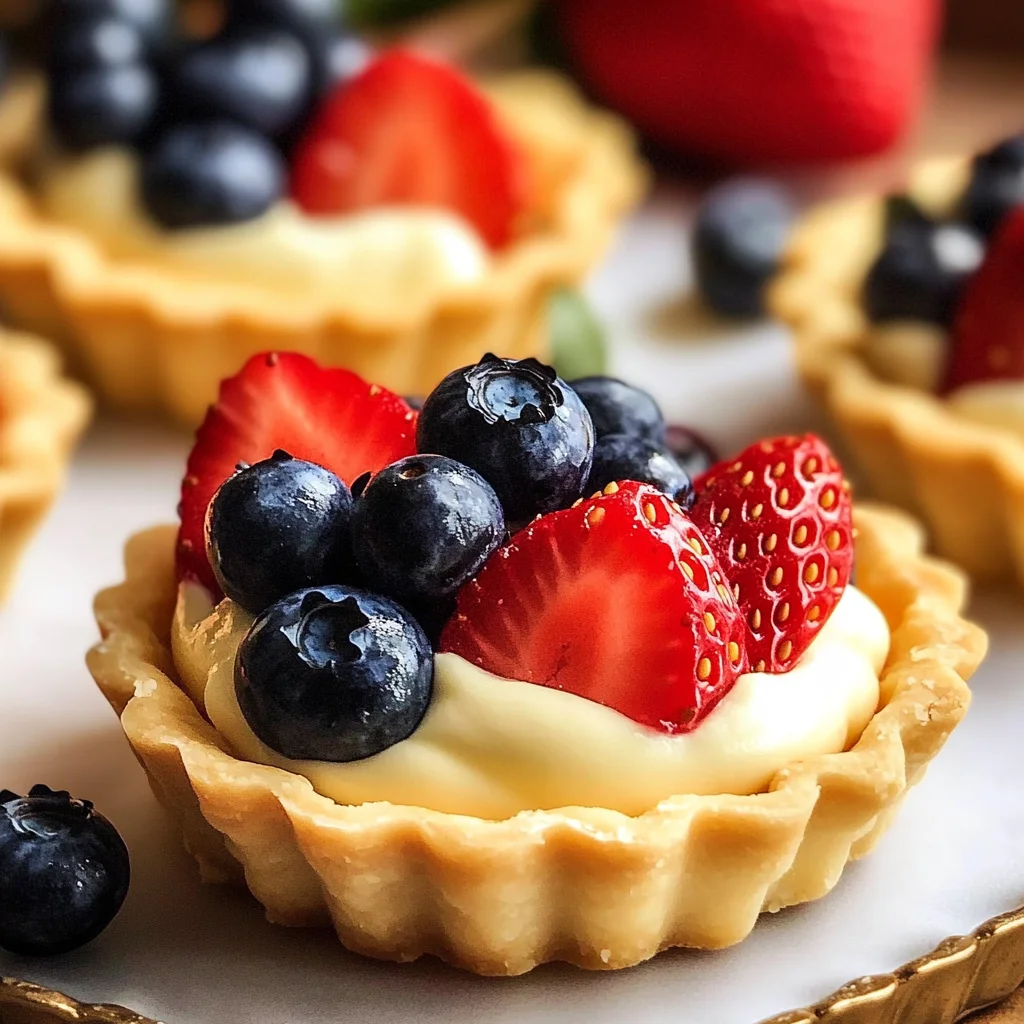
These Mini Fruit Tarts With Pastry Cream are a delightful treat for any occasion. Their buttery tart shells, creamy filling, and fresh fruit toppings make them not only delicious but also visually appealing. Perfect for parties, picnics, or simply as a sweet indulgence at home, these mini tarts will impress everyone at the table.

Jump to:
- Why You’ll Love This Recipe
- Tools and Preparation
- Essential Tools and Equipment
- Importance of Each Tool
- Ingredients
- For the Tart Shells
- For the Pastry Cream Filling
- For Topping
- How to Make Mini Fruit Tarts With Pastry Cream
- Step 1: Prepare the Tart Dough
- Step 2: Incorporate the Butter
- Step 3: Add Egg and Vanilla
- Step 4: Chill the Dough
- Step 5: Roll Out Dough
- Step 6: Cut Tart Shapes
- Step 7: Fill Mini Tart Pans
- Step 8: Prepare for Baking
- Step 9: Bake Tarts
- How to Serve Mini Fruit Tarts With Pastry Cream
- For a Casual Gathering
- For a Formal Event
- For Kids’ Parties
- As Part of a Dessert Table
- How to Perfect Mini Fruit Tarts With Pastry Cream
- Best Side Dishes for Mini Fruit Tarts With Pastry Cream
- Common Mistakes to Avoid
- Storage & Reheating Instructions
- Refrigerator Storage
- Freezing Mini Fruit Tarts With Pastry Cream
- Reheating Mini Fruit Tarts With Pastry Cream
- Frequently Asked Questions
- How do I make Mini Fruit Tarts With Pastry Cream?
- Can I use different fruits for my Mini Fruit Tarts?
- What is the best way to store Mini Fruit Tarts With Pastry Cream?
- Can I make Mini Fruit Tarts ahead of time?
- Final Thoughts
- 📖 Recipe Card
Why You’ll Love This Recipe
- Easy to Make: With simple ingredients and straightforward steps, these tarts are beginner-friendly.
- Versatile: You can customize the fruit toppings based on seasonal availability or personal preference.
- Deliciously Creamy: The homemade pastry cream filling adds a rich and smooth texture that complements the tart shell perfectly.
- Perfect for Entertaining: These mini tarts are great for gatherings, making them an impressive dessert choice.
- Beautiful Presentation: Their vibrant colors and elegant appearance make them a standout dessert.
Tools and Preparation
To create these mini fruit tarts successfully, you will need some essential kitchen tools.
Essential Tools and Equipment
- Food processor
- Rolling pin
- Mini tart pans
- Cookie cutter or round bowl
- Mixing bowls
- Whisk
Importance of Each Tool
- Food processor: Speeds up dough preparation by mixing ingredients quickly and evenly.
- Rolling pin: Helps achieve an even thickness for your pastry dough, ensuring uniform cooking.
- Mini tart pans: Provide the perfect shape for baking individual portions of the tarts.
Ingredients
These mini fruit tarts are made with easy and buttery tart shells, filled with homemade pastry cream, and topped with fresh fruit.
For the Tart Shells
- 1/2 cup Butter (unsalted, cold)
- 1 Egg
- 1/2 tsp Vanilla extract
- 1/2 cup Powder sugar
- 1/4 tsp Kosher salt
- 2 cups Flour
For the Pastry Cream Filling
- 1 3/4 cups Milk
- 2 tsp Vanilla extract
- 5 Egg yolks
- 1/4 tsp Kosher salt
- 1/2 cup Granulated sugar
- 3 tbsp Cornstarch
For Topping
- Strawberries
- Blueberries
- 1 tbsp Apricot jam
- 1/2 tsp Water
How to Make Mini Fruit Tarts With Pastry Cream
Step 1: Prepare the Tart Dough
Start by making the tart dough. In a food processor, add the flour, powdered sugar, and salt. Mix until combined.
Step 2: Incorporate the Butter
Add the cold cubed butter. Blend until you have pea-sized pieces of butter throughout. If using your hands, make sure they’re cold when mixing in the butter.
Step 3: Add Egg and Vanilla
Next, add the egg and vanilla extract. Mix until a dough forms but be careful not to overmix it.
Step 4: Chill the Dough
Cover the dough with plastic wrap and let it chill in the fridge for at least an hour.
Step 5: Roll Out Dough
Transfer the chilled dough to a floured surface. Roll it into a rectangle using a rolling pin.
Step 6: Cut Tart Shapes
Use a cookie cutter or round bowl (about 1 inch larger than your mini tart pans) to cut out small rounds of pastry.
Step 7: Fill Mini Tart Pans
Place each round into mini tart pans and gently press down to form each shell.
Step 8: Prepare for Baking
Trim off any excess edges from around the top of each tart pan. Poke holes in the bottom of each shell with a fork. Place them in the freezer for about 20 minutes.
Step 9: Bake Tarts
Bake in a preheated oven at 180°C (350°F) for approximately 15-20 minutes until they turn light golden brown. Once baked, remove from oven and allow to cool while preparing pastry cream filling.
How to Serve Mini Fruit Tarts With Pastry Cream
Serving mini fruit tarts with pastry cream is a delightful way to impress guests at any gathering. These charming desserts are versatile and can be dressed up or down depending on the occasion.
For a Casual Gathering
- Coffee Pairing: Serve with freshly brewed coffee for a relaxed afternoon treat.
- Fruit Juice: Offer a selection of refreshing fruit juices, like orange or apple, to complement the flavors.
For a Formal Event
- Elegant Platter: Arrange the tarts on a decorative platter with edible flowers for added visual appeal.
- Champagne Alternatives: Pair with sparkling water infused with fruits for an elegant touch without alcohol.
For Kids’ Parties
- Colorful Fruit Skewers: Add fun by serving mini fruit skewers alongside the tarts.
- Ice Cream Scoops: Offer small scoops of vanilla or strawberry ice cream for a delicious combination.
As Part of a Dessert Table
- Assorted Desserts: Include various pastries, cookies, and cakes to create an inviting dessert spread.
- Themed Decorations: Use themed decorations that match the celebration for an eye-catching display.
How to Perfect Mini Fruit Tarts With Pastry Cream
Creating the perfect mini fruit tarts requires attention to detail and some helpful techniques. Here are some tips to elevate your tarts.
- Bold Chilling Time: Ensure your dough is chilled properly before baking; this prevents shrinking and helps achieve a flaky crust.
- Bold Quality Ingredients: Use high-quality butter and fresh fruits for the best flavor and texture in your tarts.
- Bold Filling Temperature: Allow your pastry cream to cool completely before filling the tarts; this ensures the crust remains crisp.
- Bold Fruit Selection: Choose seasonal fruits for vibrant colors and flavors that enhance the overall presentation.
- Bold Glazing Technique: Brush the tops of your fruit with apricot jam mixed with a little water for a beautiful glaze that adds shine.
Best Side Dishes for Mini Fruit Tarts With Pastry Cream
Pairing side dishes with your mini fruit tarts can create a well-rounded dessert experience. Here are some delicious options to consider.
- Bold Whipped Cream: A dollop of freshly whipped cream adds richness and complements the sweetness of the tarts.
- Bold Yogurt Parfait: Layer yogurt with granola and fresh fruits for a refreshing contrast to the tarts.
- Bold Chocolate Sauce: Drizzle warm chocolate sauce over each tart for an indulgent twist.
- Bold Berry Compote: Serve a side of berry compote that can be spooned over the tarts or enjoyed separately.
- Bold Nut Assortment: Present a bowl of mixed nuts as a crunchy accompaniment that balances sweetness.
- Bold Citrus Salad: A light salad made from citrus segments and mint enhances freshness alongside the rich flavors of the dessert.
- Bold Biscotti: Crisp biscotti can offer an interesting texture contrast when served alongside these fruity treats.
Common Mistakes to Avoid
Making mini fruit tarts can be a delightful experience, but some common mistakes can ruin your efforts. Here are a few tips to help you succeed.
- Bold dough mixing: Overmixing your tart dough can lead to tough shells. Mix just until combined for a tender texture.
- Bold chilling time: Skipping the chilling period can cause your dough to shrink while baking. Always chill the dough for at least an hour.
- Bold proper measuring: Not measuring ingredients accurately may lead to inconsistent results. Use a kitchen scale for precise measurements when possible.
- Bold tart shell filling: Filling the tart shells too early can make them soggy. Wait until right before serving to add your pastry cream and fresh fruits.
- Bold oven temperature: Baking at the wrong temperature will affect the crust’s doneness. Always preheat your oven and check with an oven thermometer for accuracy.
Storage & Reheating Instructions
Refrigerator Storage
- Store mini fruit tarts in an airtight container in the refrigerator.
- They can be kept for up to 3 days.
Freezing Mini Fruit Tarts With Pastry Cream
- Freeze the unfilled tart shells in an airtight container for up to 2 months.
- Fill and decorate with fresh fruit after thawing for best results.
Reheating Mini Fruit Tarts With Pastry Cream
- Oven: Preheat to 350°F (175°C) and warm tart shells for about 5-10 minutes.
- Microwave: Heat on medium power in short bursts of 10-15 seconds, checking frequently.
- Stovetop: Place tarts in a covered skillet over low heat for a few minutes until warmed.
Frequently Asked Questions
Here are some common questions about making mini fruit tarts with pastry cream.
How do I make Mini Fruit Tarts With Pastry Cream?
To make mini fruit tarts, prepare the tart shell dough, chill it, bake until golden, then fill with homemade pastry cream and top with fresh fruits.
Can I use different fruits for my Mini Fruit Tarts?
Absolutely! Feel free to customize your mini fruit tarts with any seasonal fruits like kiwis, raspberries, or peaches according to your taste.
What is the best way to store Mini Fruit Tarts With Pastry Cream?
Store them in an airtight container in the refrigerator for up to 3 days or freeze unfilled shells for later use.
Can I make Mini Fruit Tarts ahead of time?
Yes, you can prepare the tart shells and pastry cream ahead of time. Assemble them just before serving for the best texture and freshness.
Final Thoughts
These mini fruit tarts with pastry cream are not only delicious but also versatile! You can easily customize them with your favorite fruits or even try different fillings. We encourage you to give this recipe a try and impress your family and friends!
Did You Enjoy Making This Recipe? Please rate this recipe with ⭐⭐⭐⭐⭐ or leave a comment.
📖 Recipe Card
Print
Mini Fruit Tarts With Pastry Cream
- Total Time: 50 minutes
- Yield: Approximately 12 mini tarts 1x
Description
Mini Fruit Tarts With Pastry Cream are a delightful dessert that will charm your guests and satisfy your sweet cravings. These bite-sized treats feature buttery tart shells filled with smooth homemade pastry cream, topped with an array of vibrant, fresh fruits. Perfect for any occasion—from casual gatherings to elegant events—these mini tarts are as easy to make as they are visually stunning. Customize them with seasonal fruits for a personalized touch, making each batch unique. Impress your family and friends with these delectable desserts that are sure to be a hit!
Ingredients
- 1/2 cup unsalted butter (cold)
- 1 egg
- 1/2 tsp vanilla extract
- 1/2 cup powdered sugar
- 1/4 tsp kosher salt
- 2 cups flour
- 1 3/4 cups milk
- 5 egg yolks
- 1/2 cup granulated sugar
- 3 tbsp cornstarch
- Fresh strawberries and blueberries for topping
Instructions
- In a food processor, combine flour, powdered sugar, and salt; mix until blended.
- Add cold cubed butter; pulse until pea-sized pieces form.
- Incorporate egg and vanilla extract; mix until a dough forms without overmixing.
- Chill the dough wrapped in plastic in the fridge for at least an hour.
- Roll out the chilled dough on a floured surface and cut into small rounds.
- Place rounds into mini tart pans, pressing gently to shape.
- Freeze for about 20 minutes, then bake at 350°F (180°C) for 15–20 minutes until golden brown.
- Cool completely before filling with pastry cream and topping with fresh fruits.
- Prep Time: 30 minutes
- Cook Time: 20 minutes
- Category: Dessert
- Method: Baking
- Cuisine: American
Nutrition
- Serving Size: 1 mini tart (30g)
- Calories: 135
- Sugar: 7g
- Sodium: 62mg
- Fat: 7g
- Saturated Fat: 4g
- Unsaturated Fat: 3g
- Trans Fat: 0g
- Carbohydrates: 16g
- Fiber: <1g
- Protein: 2g
- Cholesterol: 60mg